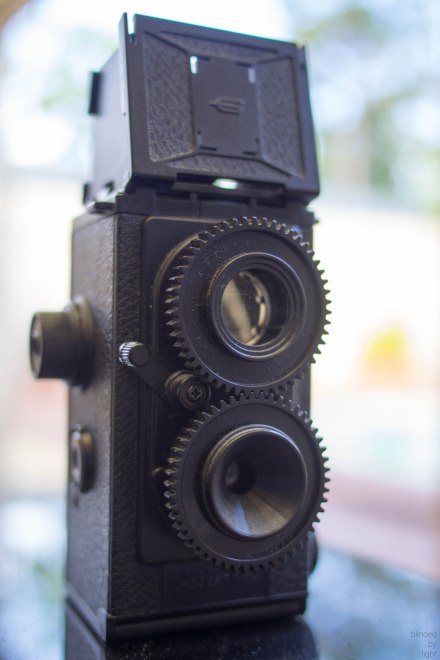
Otona no Kagaku (大人の科学) is a great little magazine series in Japan, literally translating into “Adult’s Science” or “Science for Adults”, and is released irregularly, roughly every few months. Each volume contains a DIY kit of the product of that issue, as well as a magazine which contains any necessary assembly instructions and, usually, a brief history of the item. Volume 25, released in 2009, was a nice 35mm Twin Lens Reflex camera, known as the Gakkenflex. Since then, the Gakkenflex has gained a cult following (see http://www.flickr.com/groups/gakkenflex/), due to its unique-looking photos.
Before you even consider using the Gakkenflex, you have to assemble it first. Some may find this an annoyance or an otherwise detracting factor, but I absolutely love it. Honestly, I think half the fun in owning a Gakkenflex is assembling it. Then again, I’m a bit of a sucker for that sort of thing – I loved it so much that I then went out and bought the next volume of Otona no Kagaku, a DIY electric guitar. But I digress. Building the Gakkenflex gave me a great understanding of how Twin Lens Reflex (TLR) cameras worked, as well as just cameras in general. Another bonus with the DIY nature of this camera is that it’s about a quarter of the price of other TLR recent cameras, like the Blackbird Fly. I actually had no idea what TLR cameras were before the Gakkenflex, and I’m really happy I bought it. But just briefly, a TLR camera has two lenses – the top one is for the viewfinder screen and the second one is for the actual photo taking. What this means is that, unlike a single-lens camera, the image doesn’t black out when you take the photo.
I’m currently working on a full English “translation” of the instruction manual, so stay tuned. I say “translation” because it won’t be a straight Japanese to English translation, but I’m writing my own version of what to do, alongside the original diagrams. Hopefully it will be easier to follow that way.
UPDATE: I’ve finished the english instruction manual, so head on over and have a look if you’re wanting to build one yourself. Maybe it’ll help.
A couple of quick hints for now though – before you start, sort out the different types of screws and put them in different bowls. You’ll thank me later.

This is what you’d see looking down at the viewfinder, if it was pointed at my guitar. Which yours probably won’t be.
Once you finally assemble it (took me about an hour, taking my time), the first thing you should do is just sit back and marvel at your amazing efforts. Doesn’t it feel great? The second thing you should do is open up the top of it and look down. It was quite a mindblowing moment for me. The Gakkenflex doesn’t require batteries, yet there’s a live image on the screen when you look into it. If you built it yourself, you’d understand that this is achieved by images coming through the top lens and reflecting off the mirror onto the screen. One thing of note is that it takes a while to get used to getting what you want into the frame, just because the viewfinder isn’t held up to your eye.
In terms of using the Gakkenflex, that also takes a lot of getting used to. The focussing is done by twisting either of the lenses at the front. They’re interlocked so it doesn’t matter which one you adjust, it’ll still adjust both lenses. All this manual focussing means that you’ll need quite a bit of time to get your images into focus. I wasted an entire roll of film because I didn’t focus properly, and everything turned out really blurry. It takes practice, but after a bit of time with it, you’ll get a feel for it.
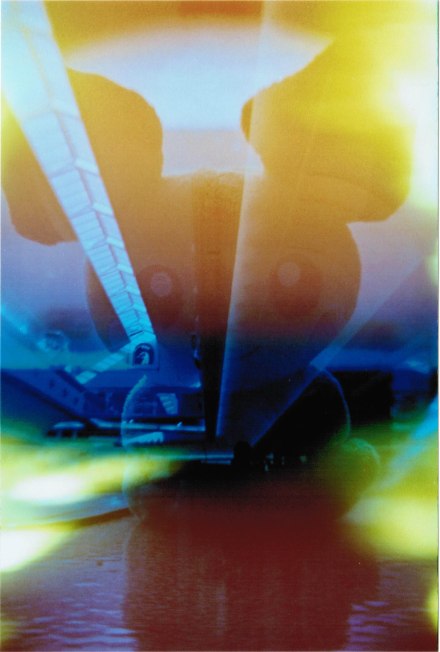
Another thing to note is that this camera requires manual winding. In other words, after you take a photo, you wind the film yourself to ready the next frame. What this means, though, is that you’re able to mess with multiple exposures and other cool effects, like the photo here.
Honestly, what it comes down to is that the Gakkenflex is a joy to use. It may take a bit of fiddling, but the photos that you get out of it are amazing. If you check here and here, you’ll find that a lot of my Gakkenflex photos have pretty intense blurring around the edges. It’s one of the quirks of this camera that I love so much. That’s the other thing – whilst it is technically a TLR camera, the photos also have that unpredictable toycam charm to it, once you figure out how to focus. You can also now shoot from the hip, while still being able to see what’s in the frame!
PS: If you have any specific questions about this camera, feel free to ask and I’ll try and get back to you.


Pingback: Gakkenflex English Instruction Manual (Otona no Kagaku Magazine Volume 25) « Blinded By Light
i just had my first roll of film scanned. there were light leaks in all of the frames. do you think there was something wrong with how i assembled it? or how i put the film? im pretty sure i did not open it after i loaded the film.
LikeLike
It’s hard to tell from here but yeah, it sounds like there was an issue with the assembly. I think maybe the body isn’t screwed together tight enough. Try going through and tightening all the outside screws and see if any of them seem to be a bit loose.
That’s all I can suggest for now. I guess try that?
LikeLike
I’ve developed two rolls of film so far, neither have had the entire roll printed properly. Of the last film 8 came out pretty good, but the rest were all blanks on the roll. A couple had dark spots on them (they weren’t printed).
Any ideas?
LikeLike